
Basic Banking Operations
The interface provides the following main operations:
Cash-in— adding funds to an account;Cash-out— withdrawing funds from an account;Transfer— transfer to a beneficiary;Internal transfer— transfer between accounts;Exchange— currency exchange.
Cash-in
Section titled “Cash-in”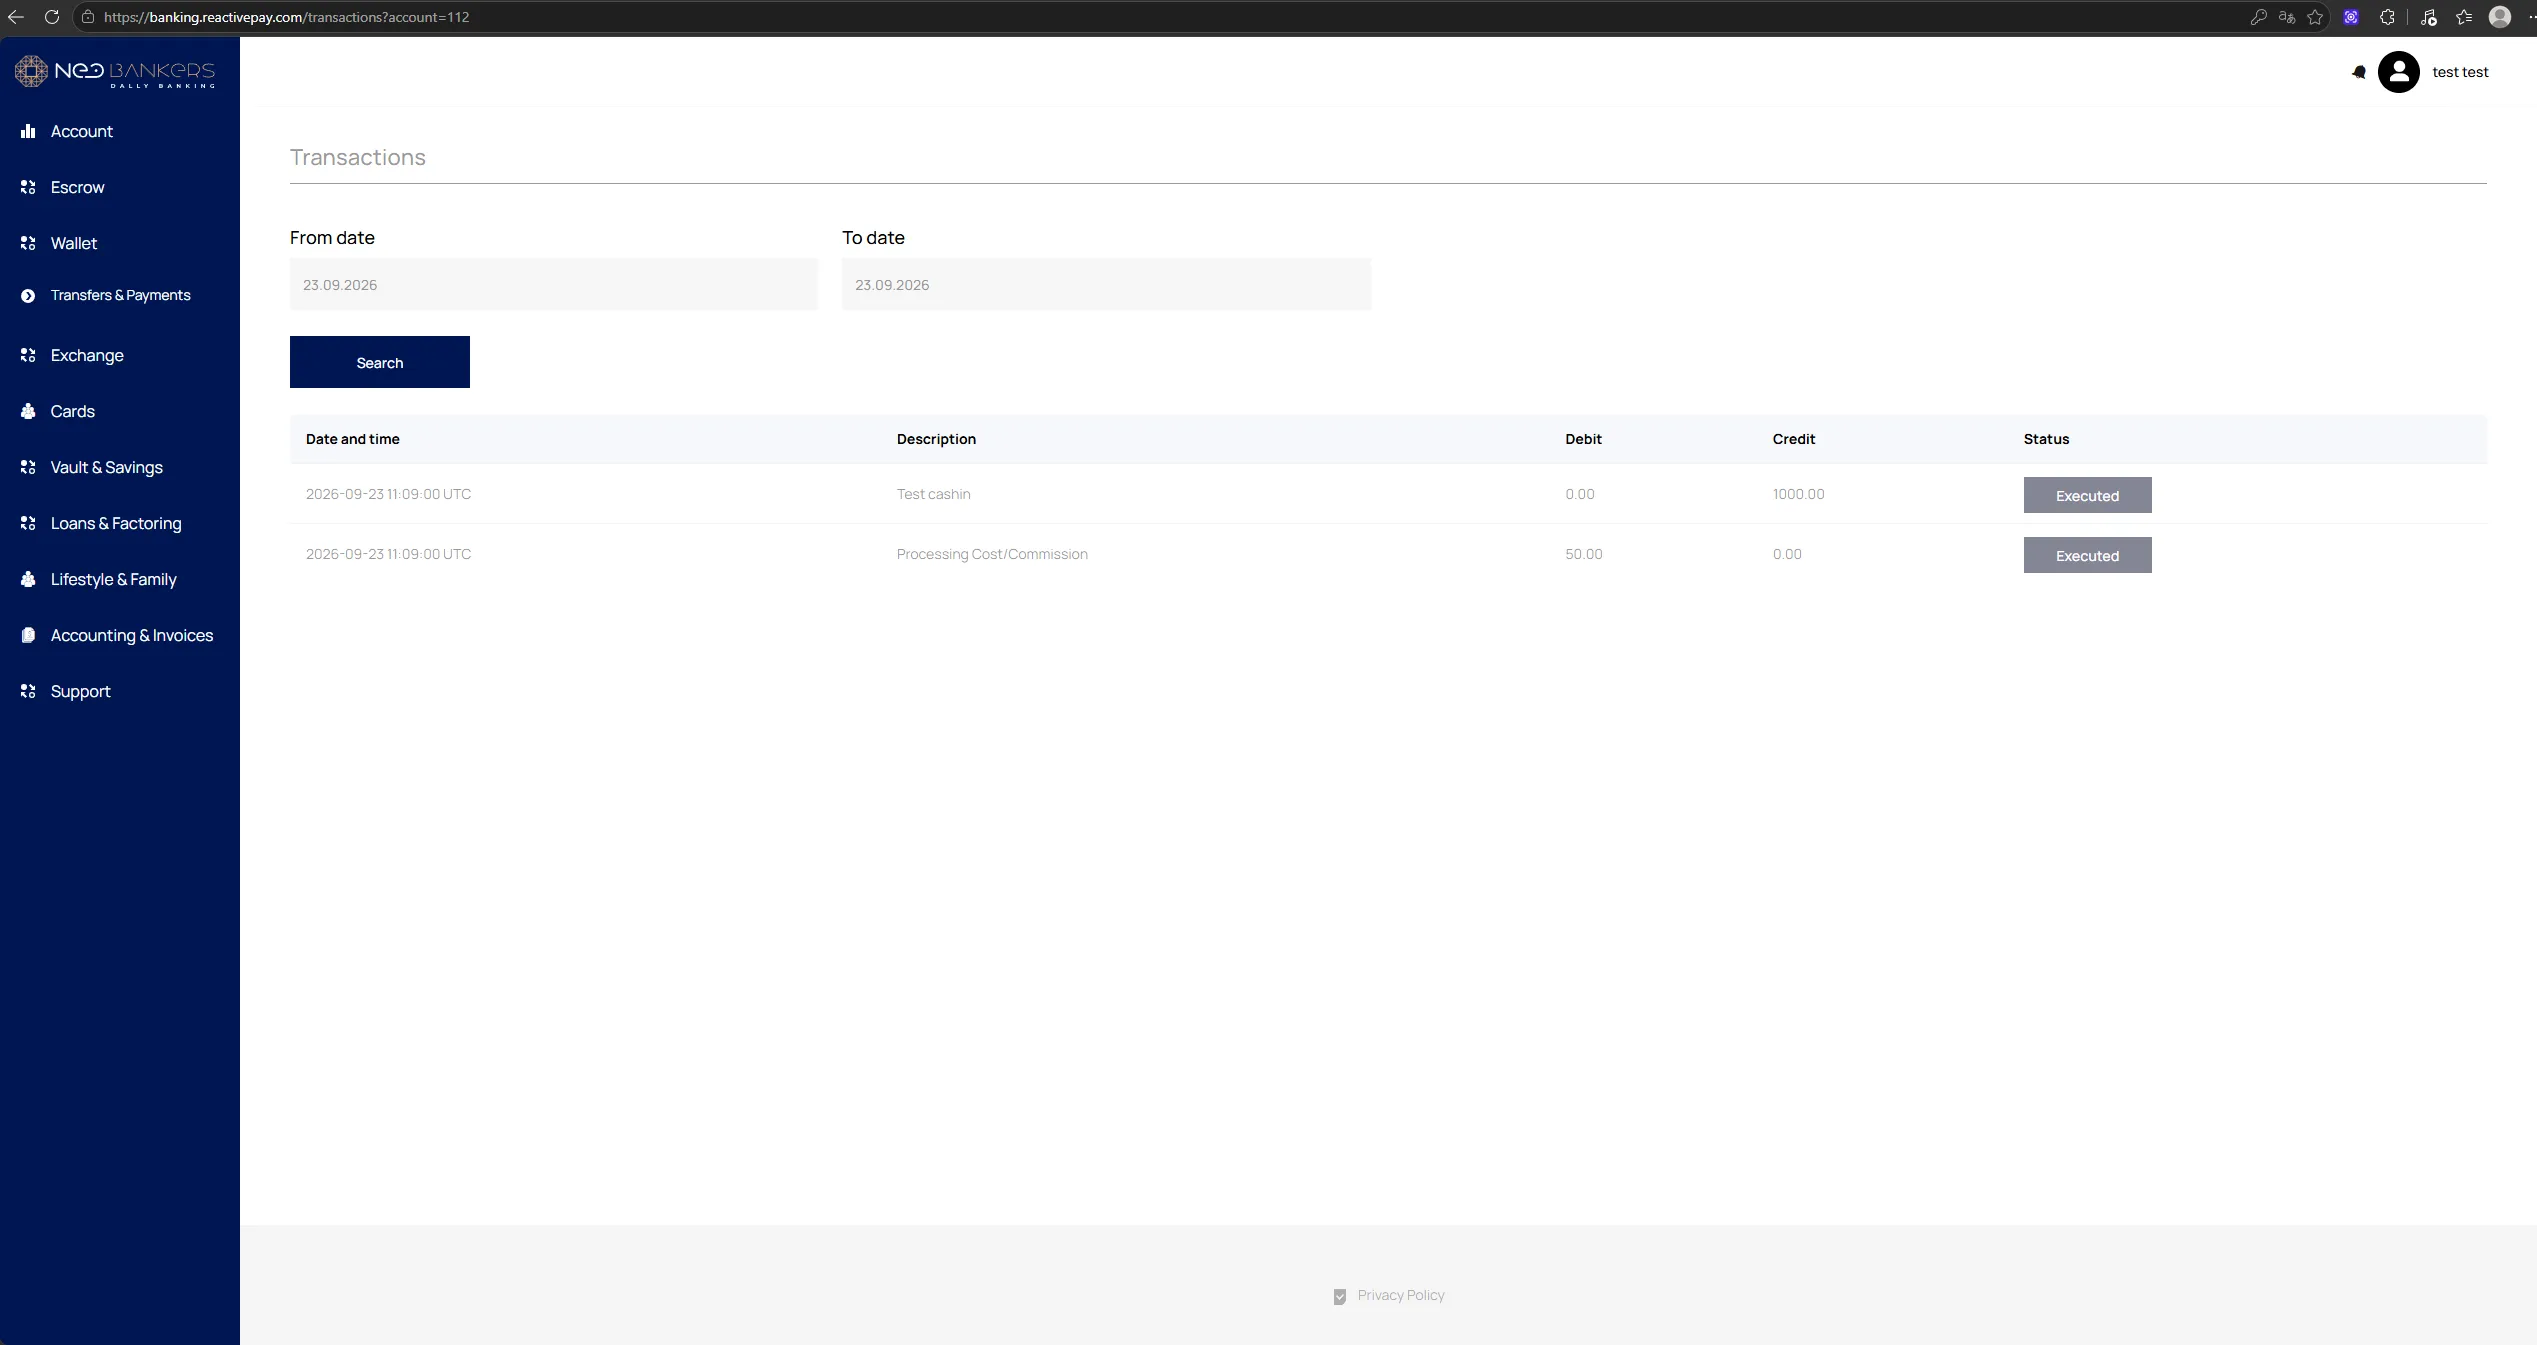
Cash-in is created in Core through Operations → Create Cashin.
Creation
Section titled “Creation”- Open
Core → Operations → Create Cashin. - Fill in:
Recipient profile id;Sender name;To account;Amount;Date / Time;Description.
- Click
Add Cashin.
Result
Section titled “Result”After creation, the operation appears in the client’s transactions. If a commission applies, the corresponding charge may be displayed as a separate line.
Cash-out
Section titled “Cash-out”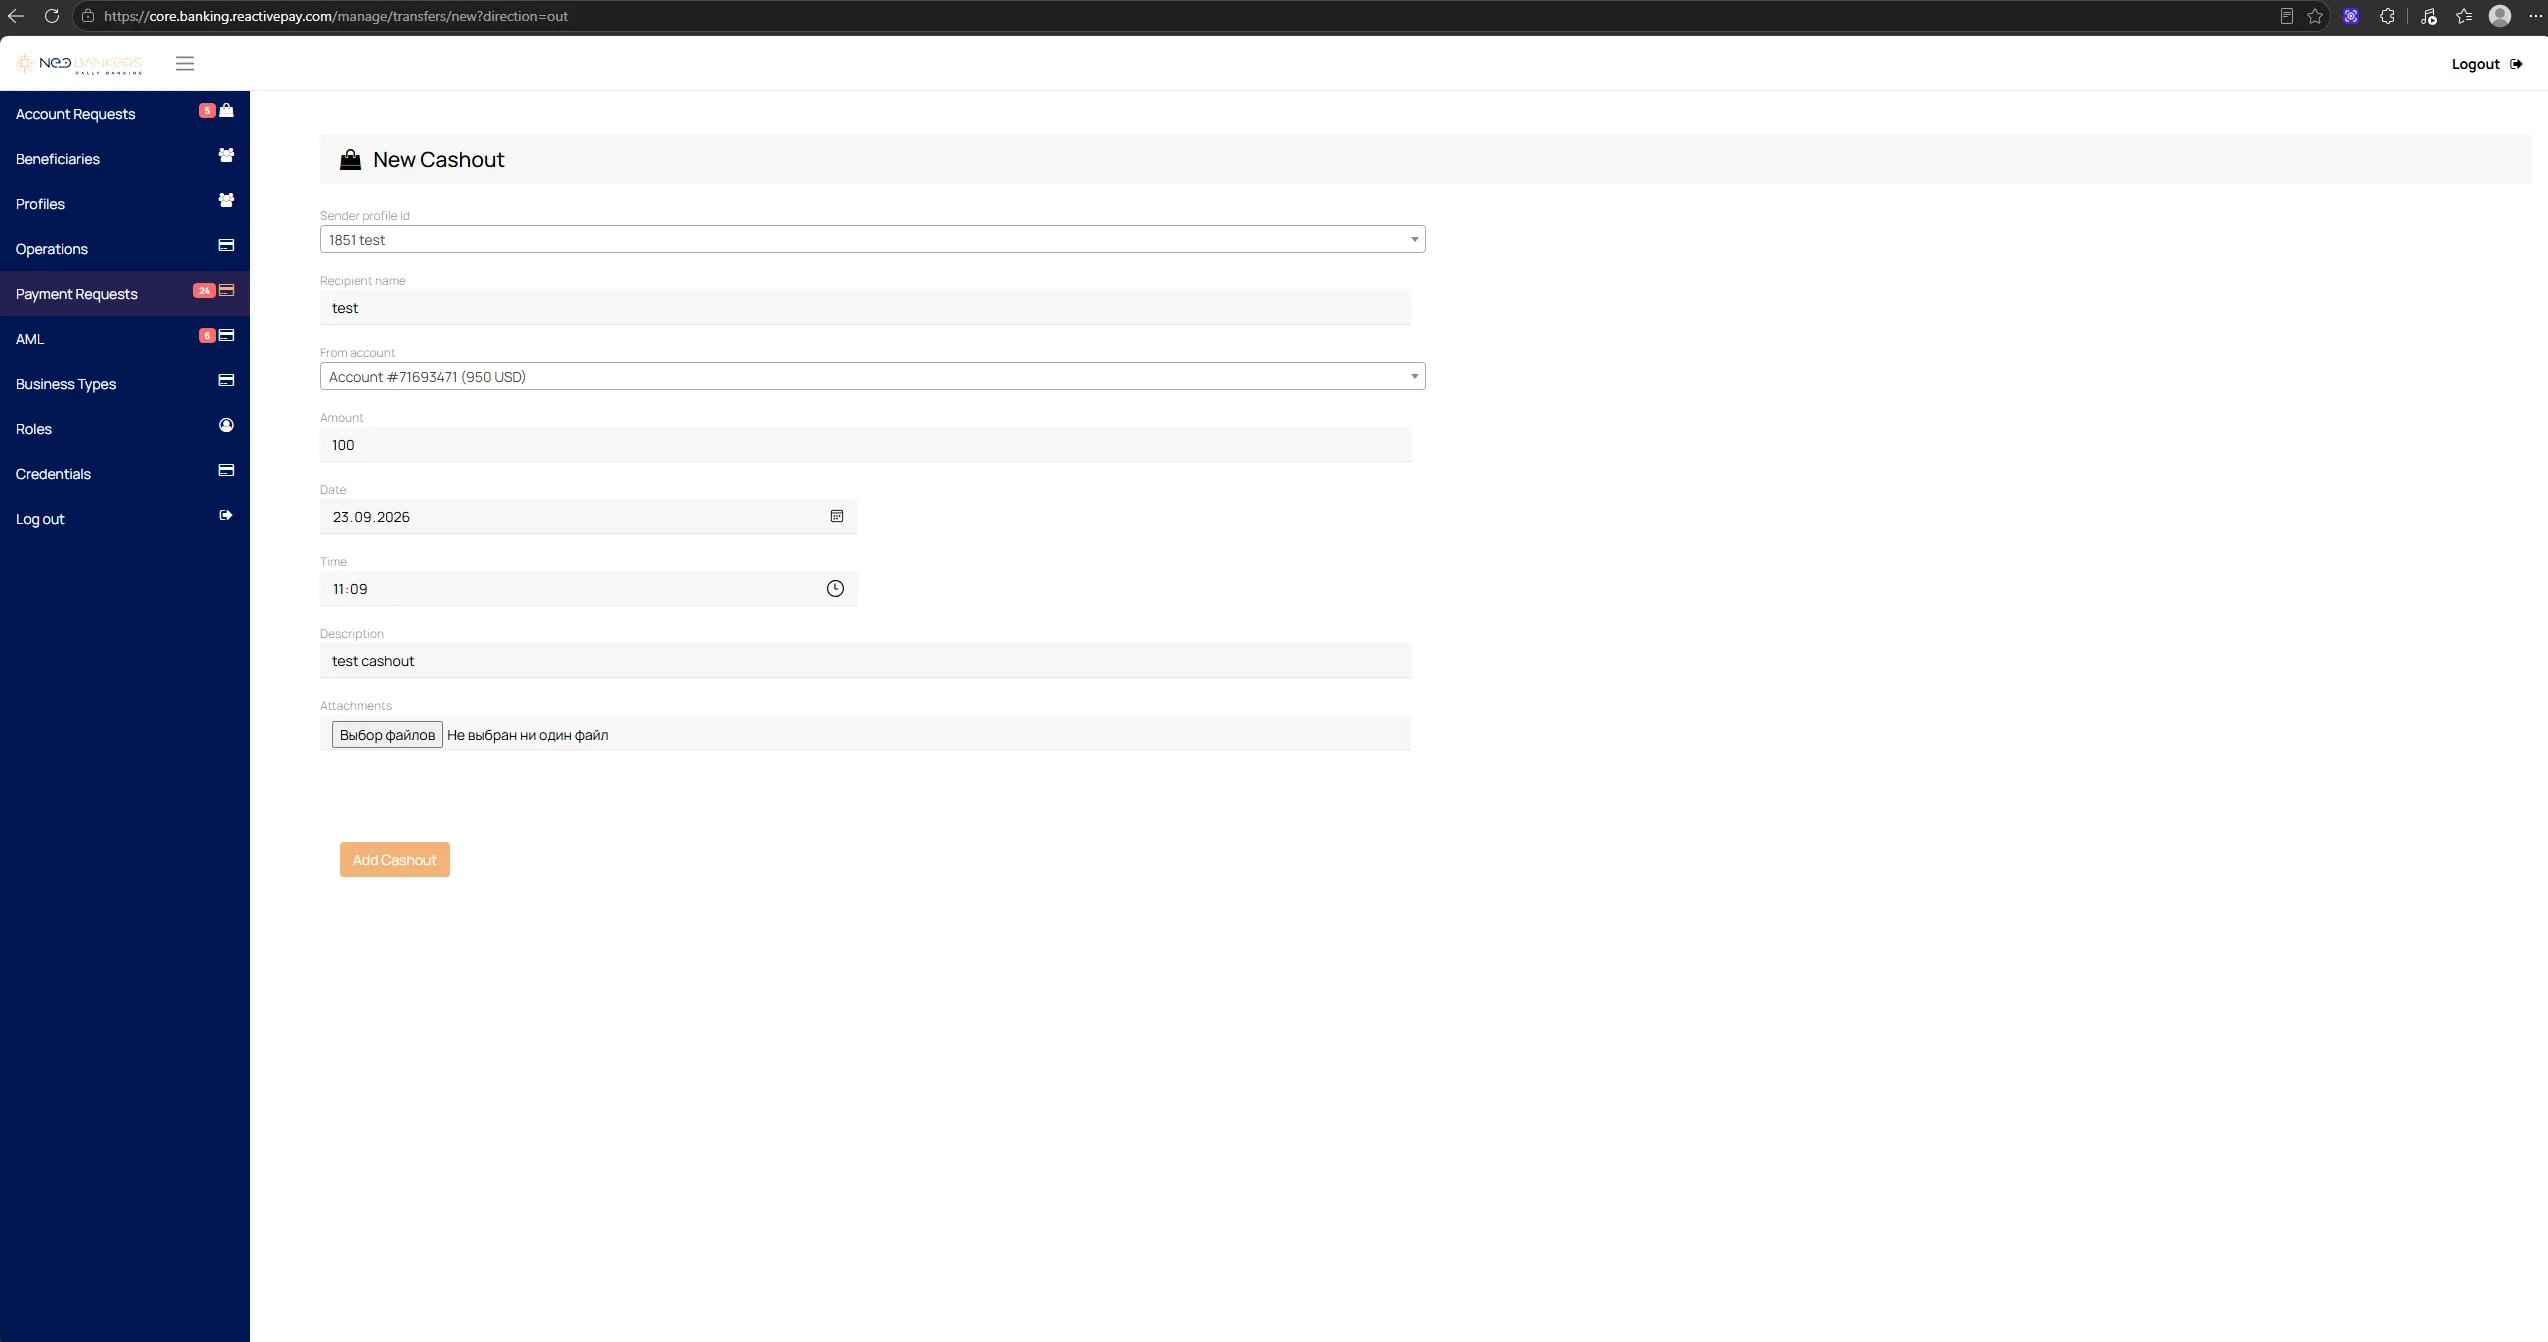
Cash-out is created in Core through Operations → Create Cashout.
Creation
Section titled “Creation”- Open
Core → Operations → Create Cashout. - Fill in:
Sender profile id;Recipient name;From account;Amount;Date / Time;Description;Attachments— if required.
- Click
Add Cashout.
Result
Section titled “Result”The operation appears in the transaction history as a debit.
Transfer
Section titled “Transfer”Transfer is used to send funds to a beneficiary. The workflow includes actions in the client’s personal cabinet and transfer approval in Core.
Step 1. Creating a Beneficiary
Section titled “Step 1. Creating a Beneficiary”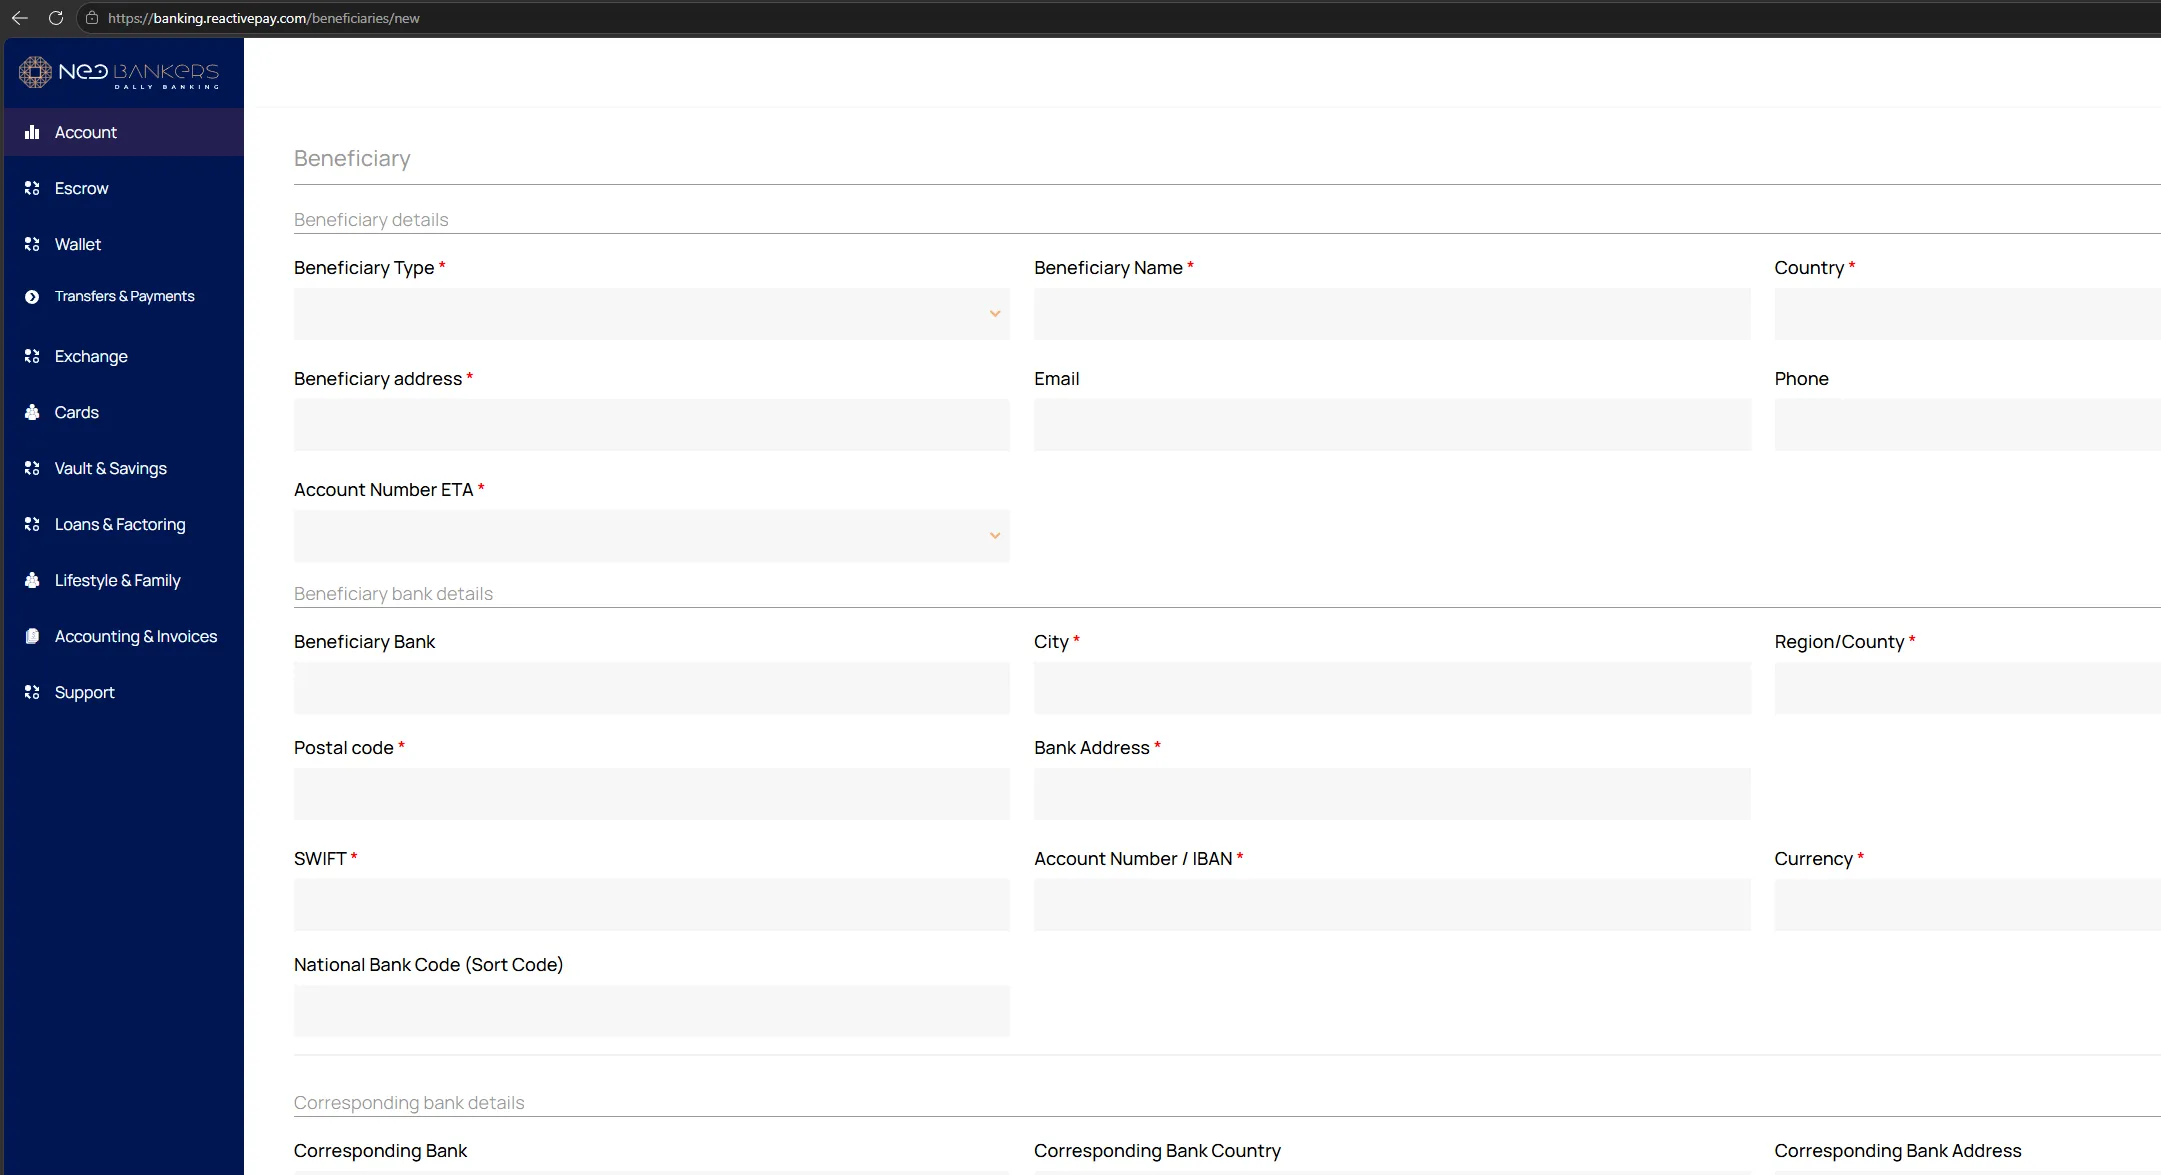
- Open
Lifestyle & Family → Beneficiary. - Click
Create New. - Fill in the recipient details.
- Click
Confirm and save.
Main form fields:
Country;Account;Account Number ETA;Beneficiary Type—BusinessorIndividual;Beneficiary Name;Beneficiary address;Email;Phone;Beneficiary Bank;City;Region/County;Postal code;Bank Address;SWIFT;Account Number / IBAN;Currency;National Bank Code (Sort Code)— for the UK;- correspondent bank details — if applicable.
Step 2. Creating a Transfer
Section titled “Step 2. Creating a Transfer”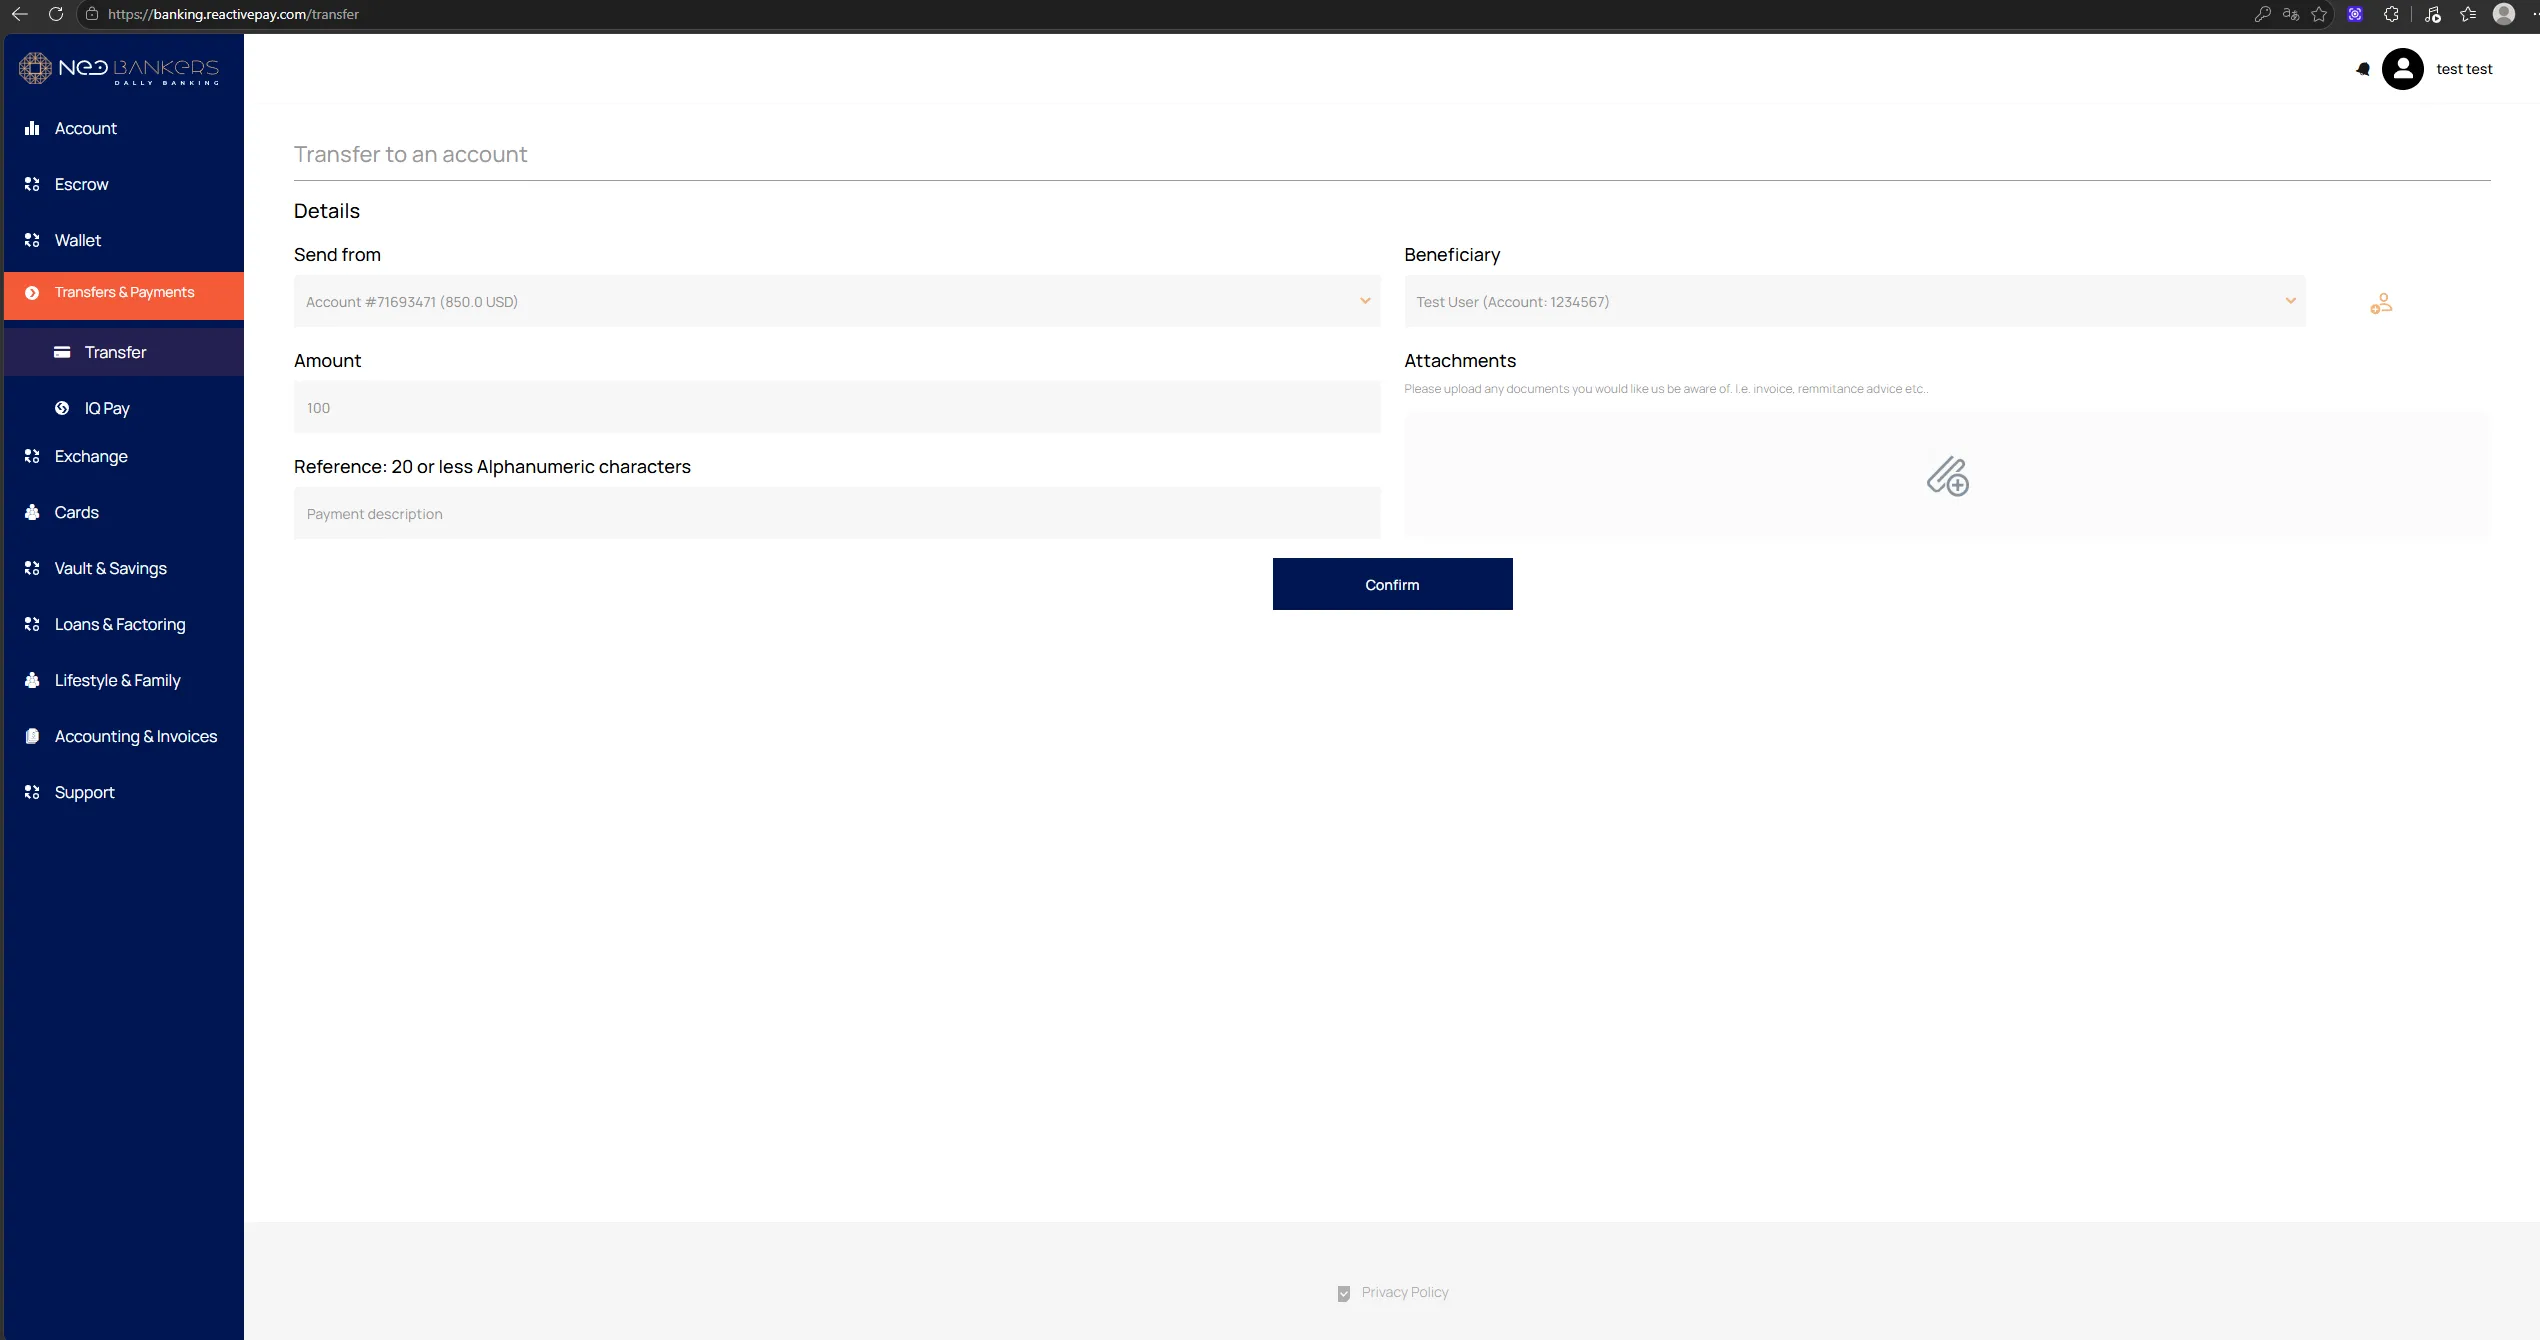
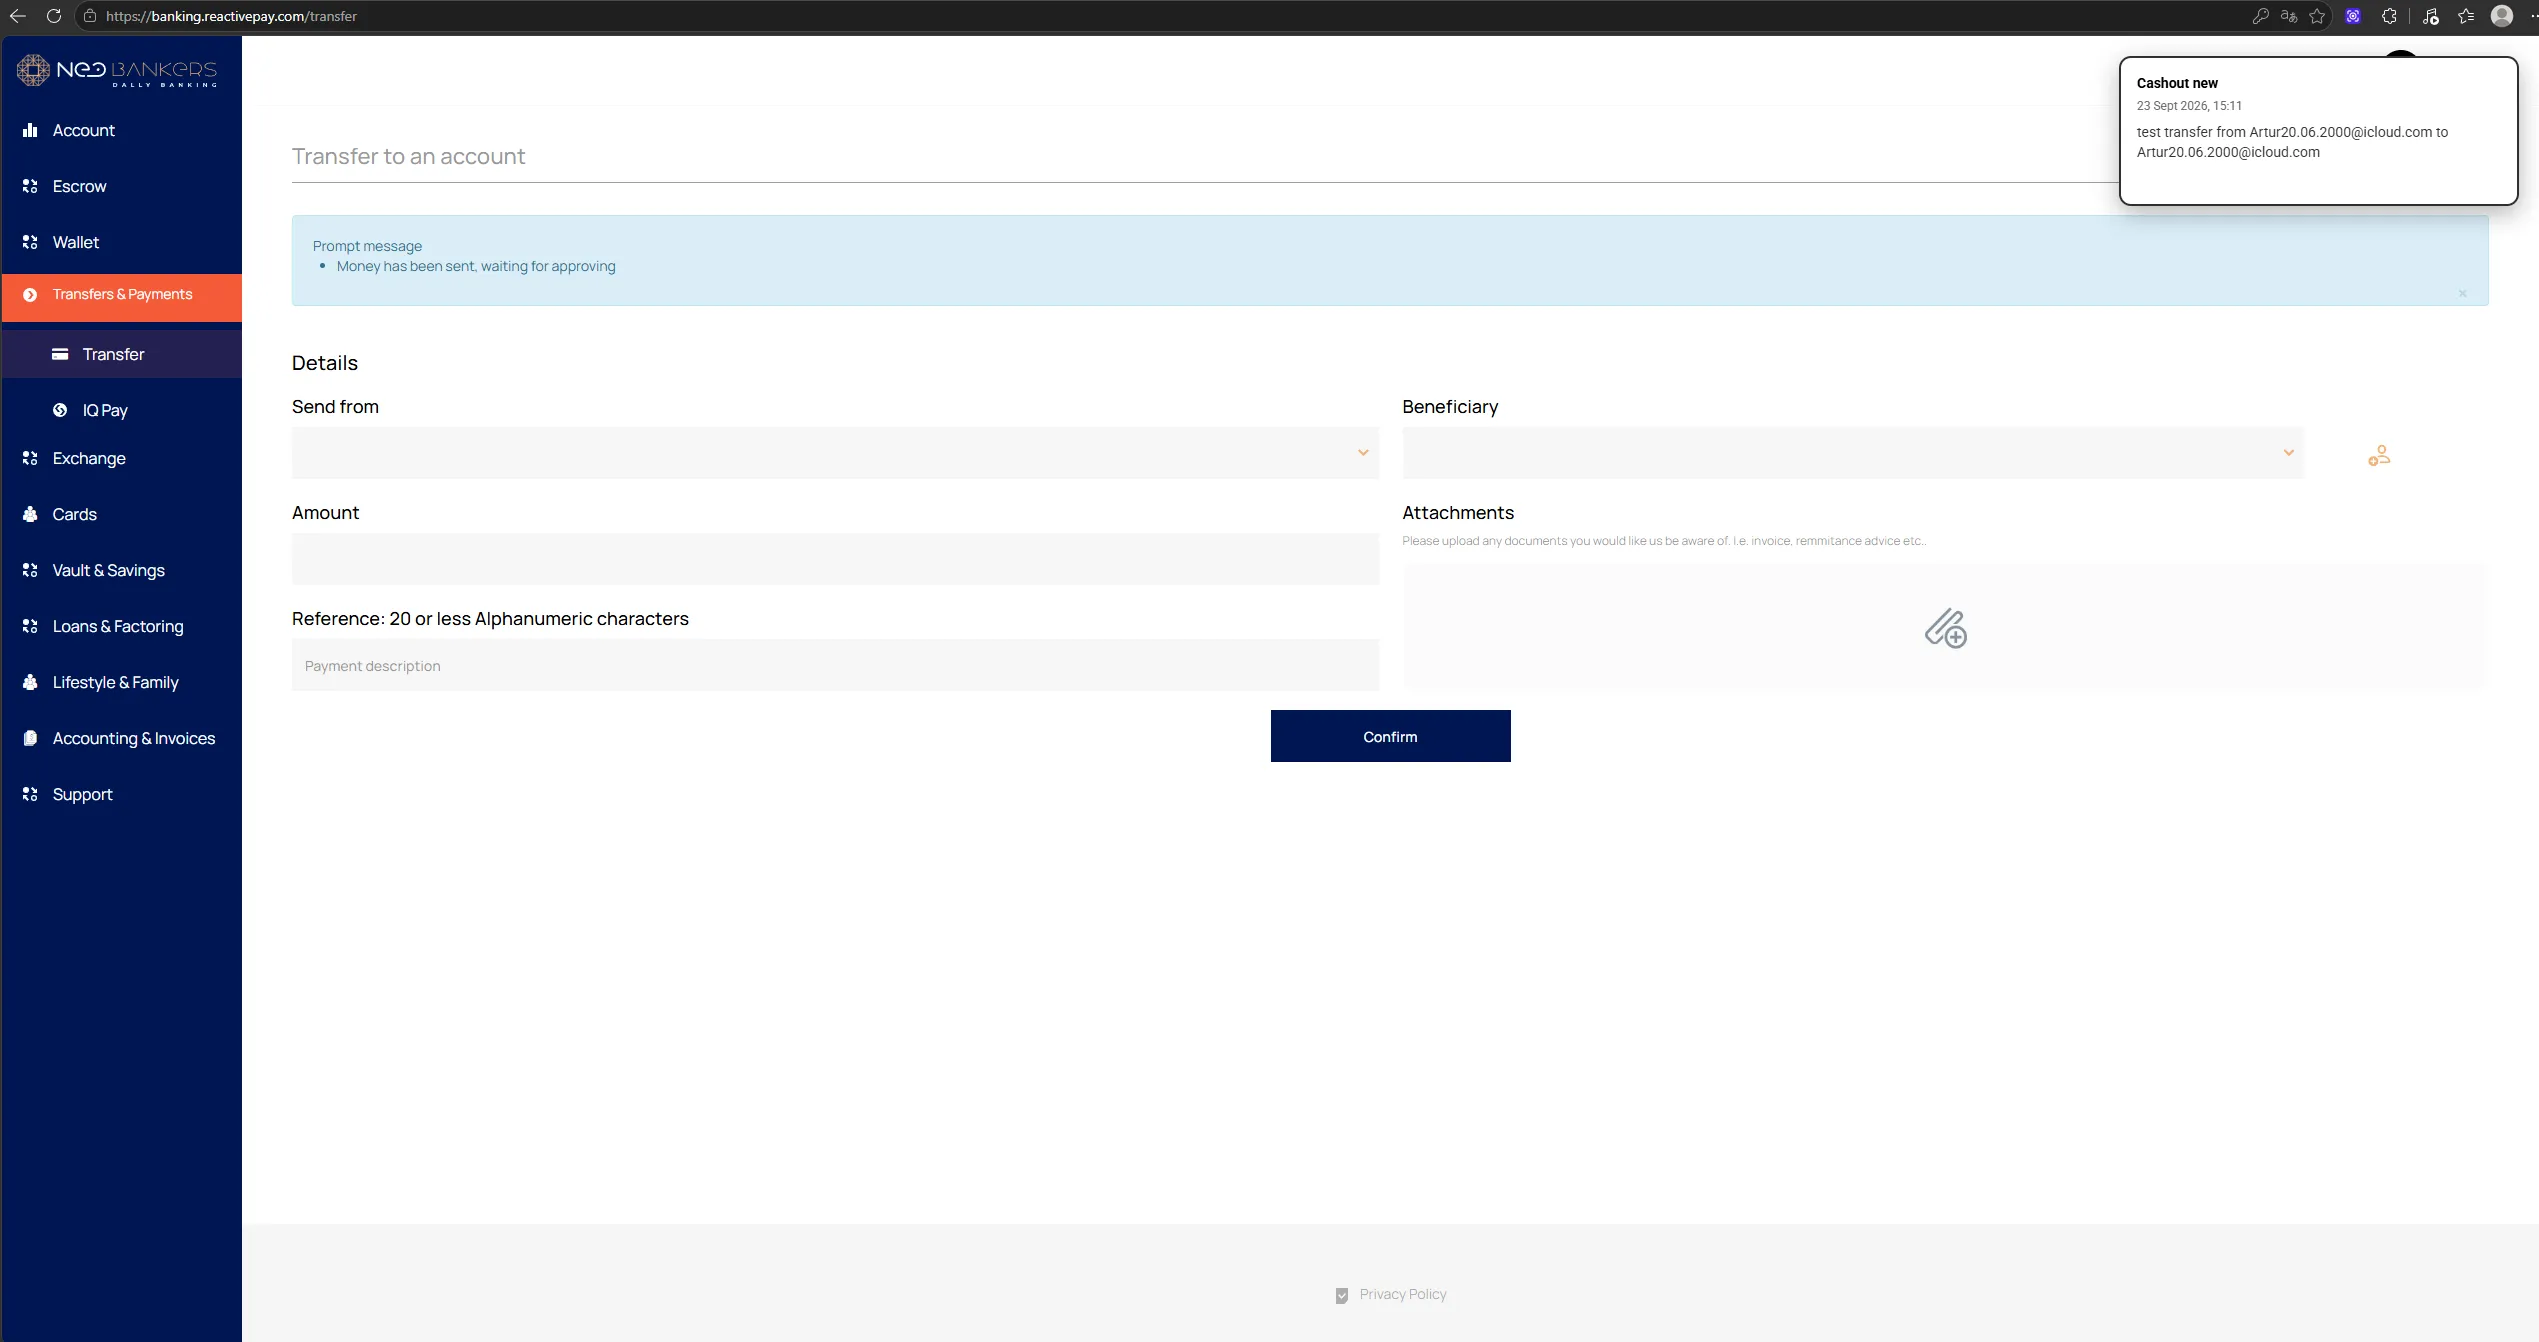
- Open
Transfers & Payments → Transfer. - Select the account in
Send from. - Select a
Beneficiary. - Enter
Amount. - Fill in
Reference. - Add
Attachmentsif required. - Click
Confirm.
In the shown interface, Reference is limited to 20 characters.
Step 3. Confirmation
Section titled “Step 3. Confirmation”After clicking Confirm, the client confirms the operation using a
password and an OTP code.
In the current scenario, the OTP is sent by email.
Step 4. Approval in Core
Section titled “Step 4. Approval in Core”- Open
Core → Payment Requests. - Find the required transfer.
- Review the operation details.
- Click
ConfirmorDecline.
Statuses
Section titled “Statuses”The interface uses, among others:
In progress— the operation is awaiting further processing;Executed— the operation has been completed;Declined— the operation has been declined.
The commission is determined by Commission settings.
Internal Transfer
Section titled “Internal Transfer”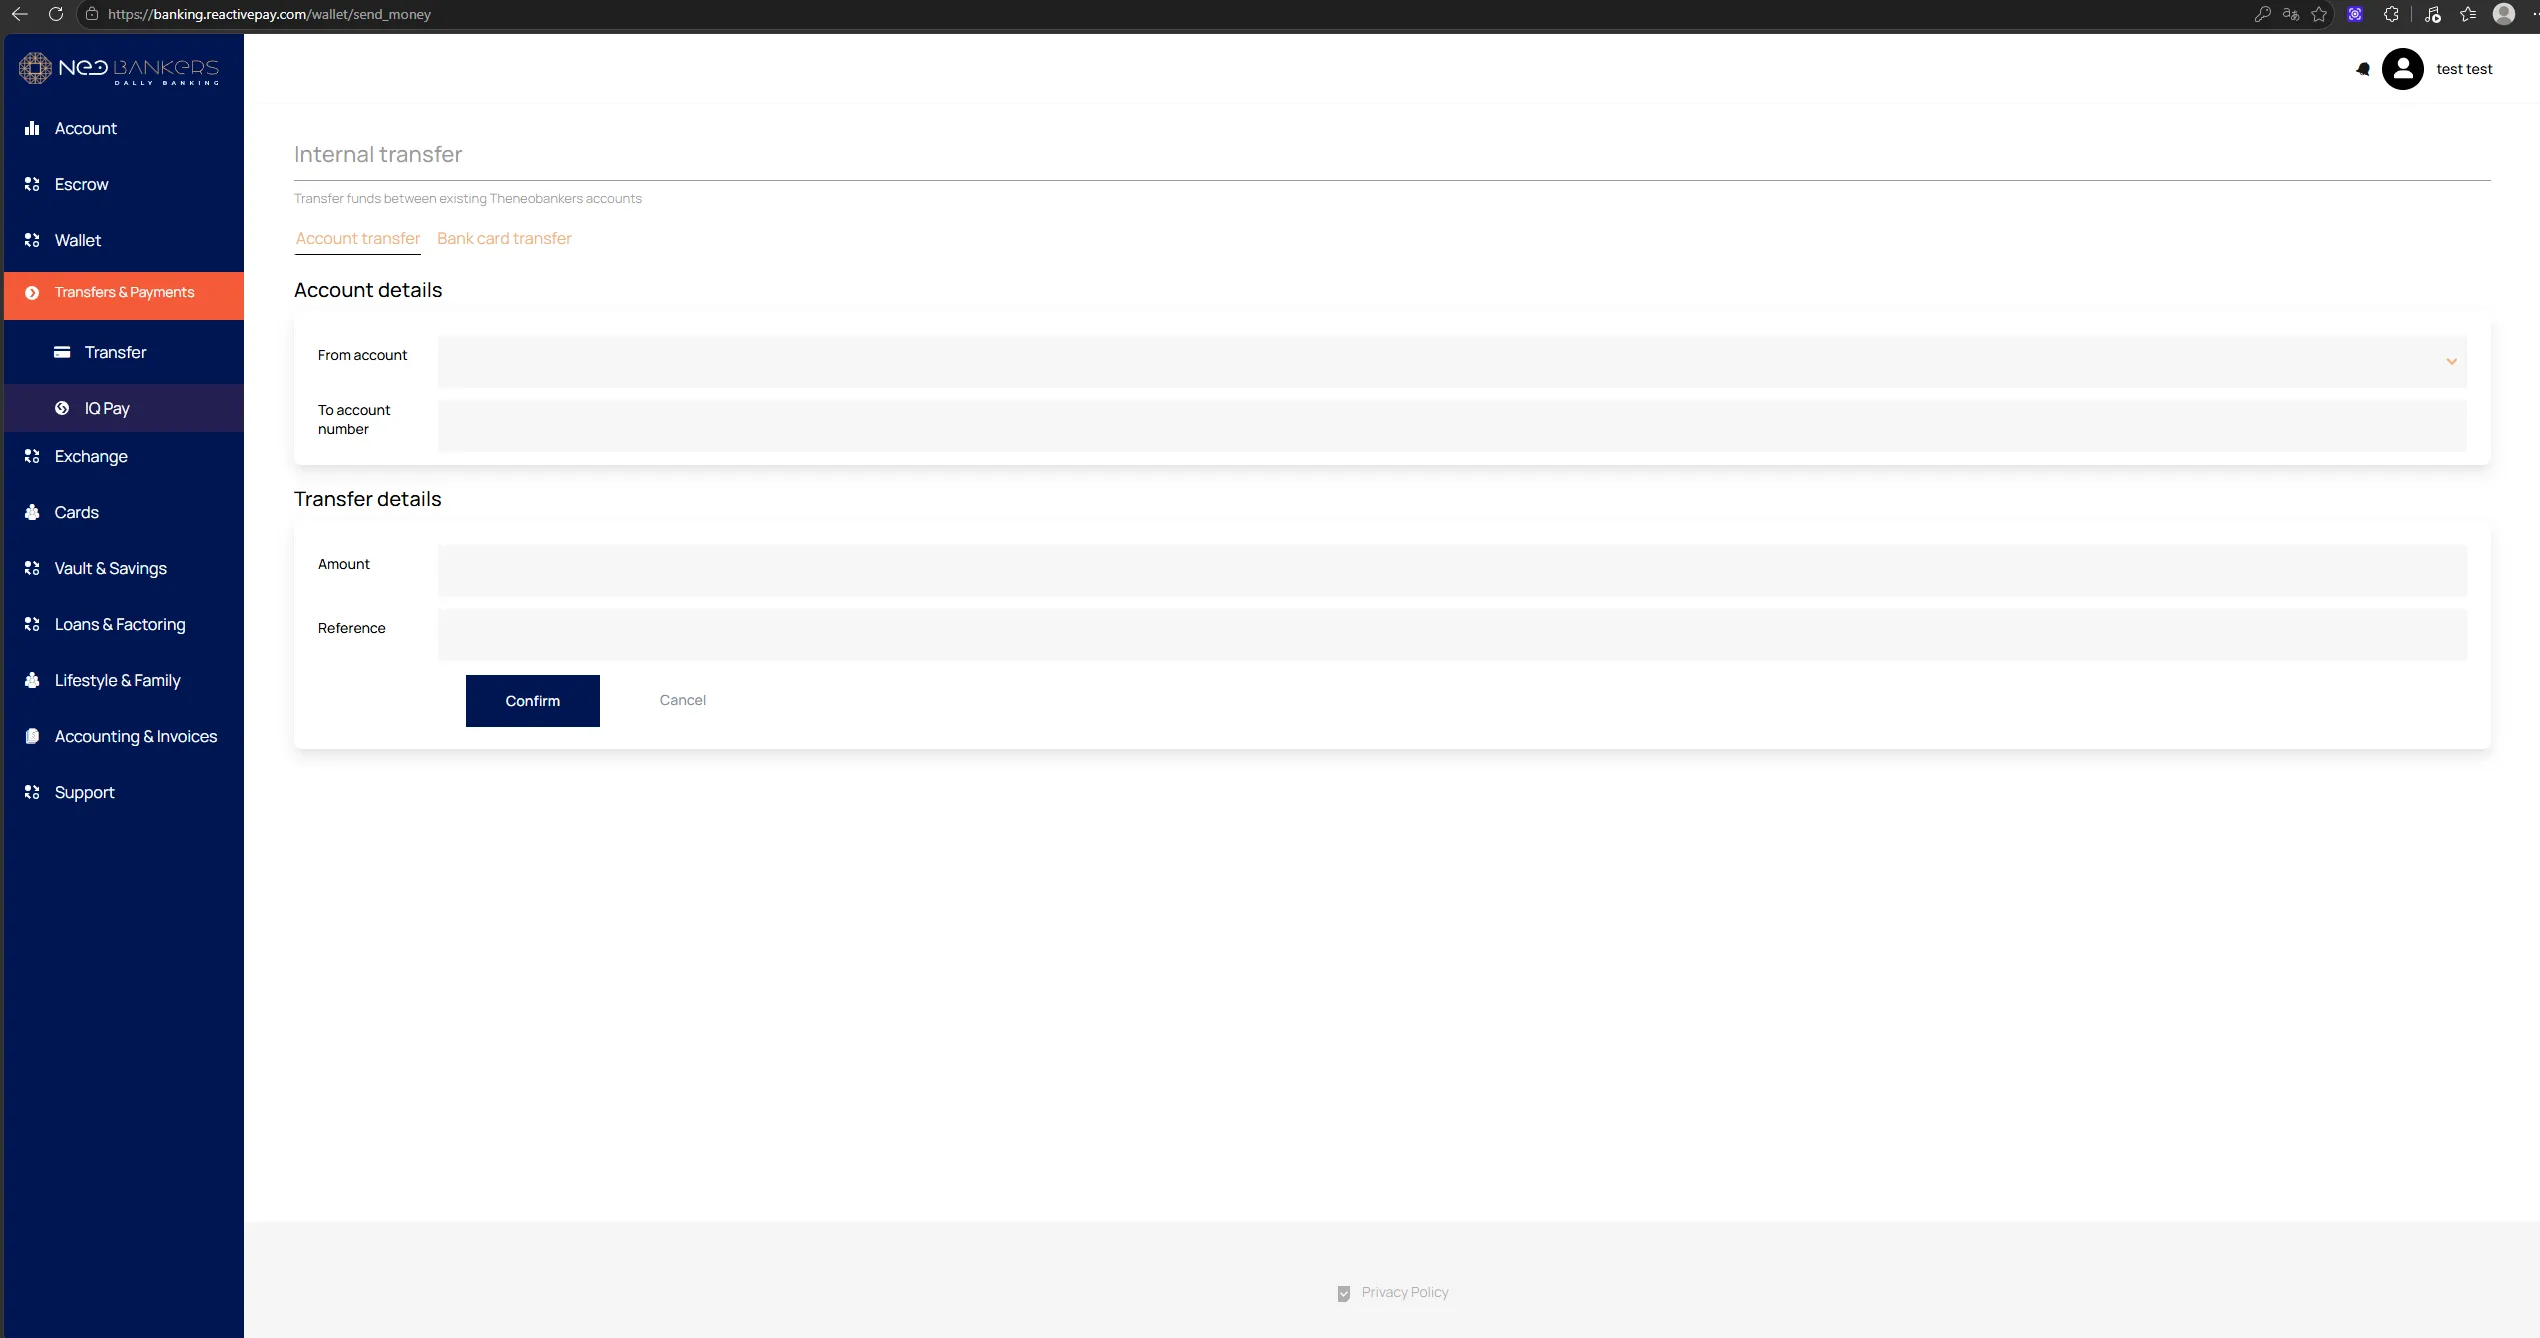
Internal transfer is used to move funds between accounts within the system.
Creation
Section titled “Creation”- Open
Transfers & Payments → Internal transfer. - Select
Account transfer. - Fill in:
From account;To account number;Amount;Reference.
- Click
Confirm. - Confirm the operation with the password.
- Enter the OTP code.
In the shown scenario, the transfer is executed immediately without separate approval in Core.
Exchange
Section titled “Exchange”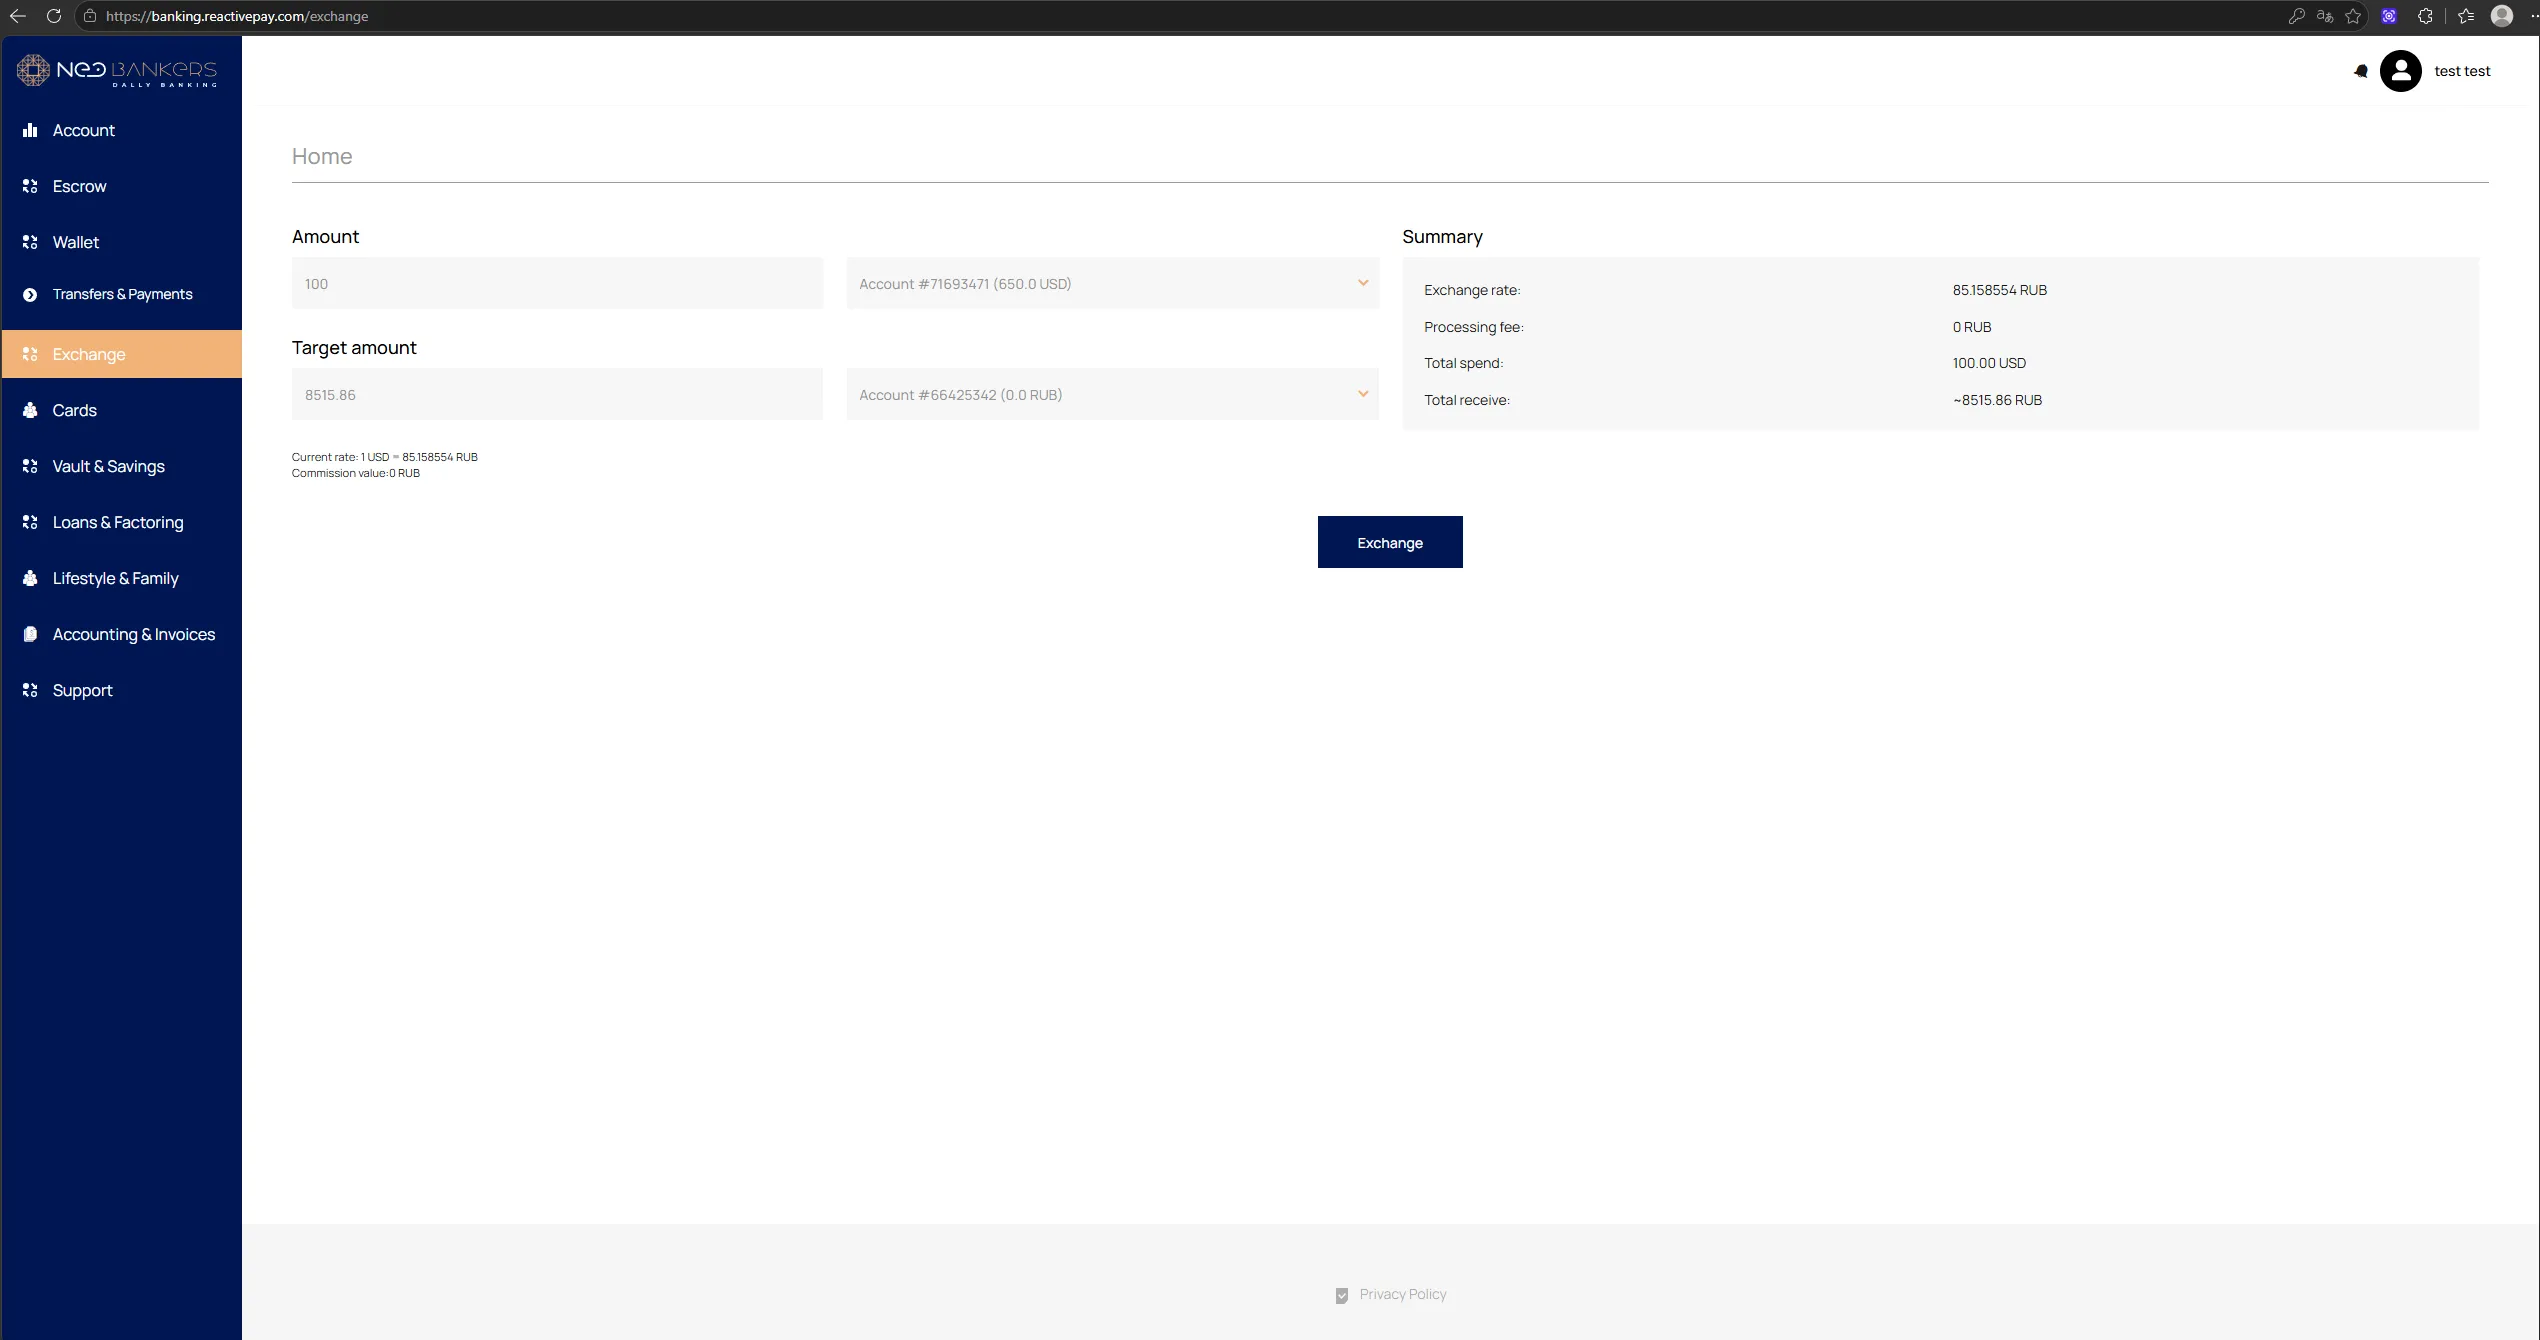
Exchange is used to exchange currencies between the client’s accounts.
Creation
Section titled “Creation”- Open
Exchange. - Enter
Amount. - Select the source account.
- Check
Target amount. - Select the destination account.
- Review
Summary:Exchange rate;Processing fee;Total spend;Total receive.
- Click
Exchange.
Result
Section titled “Result”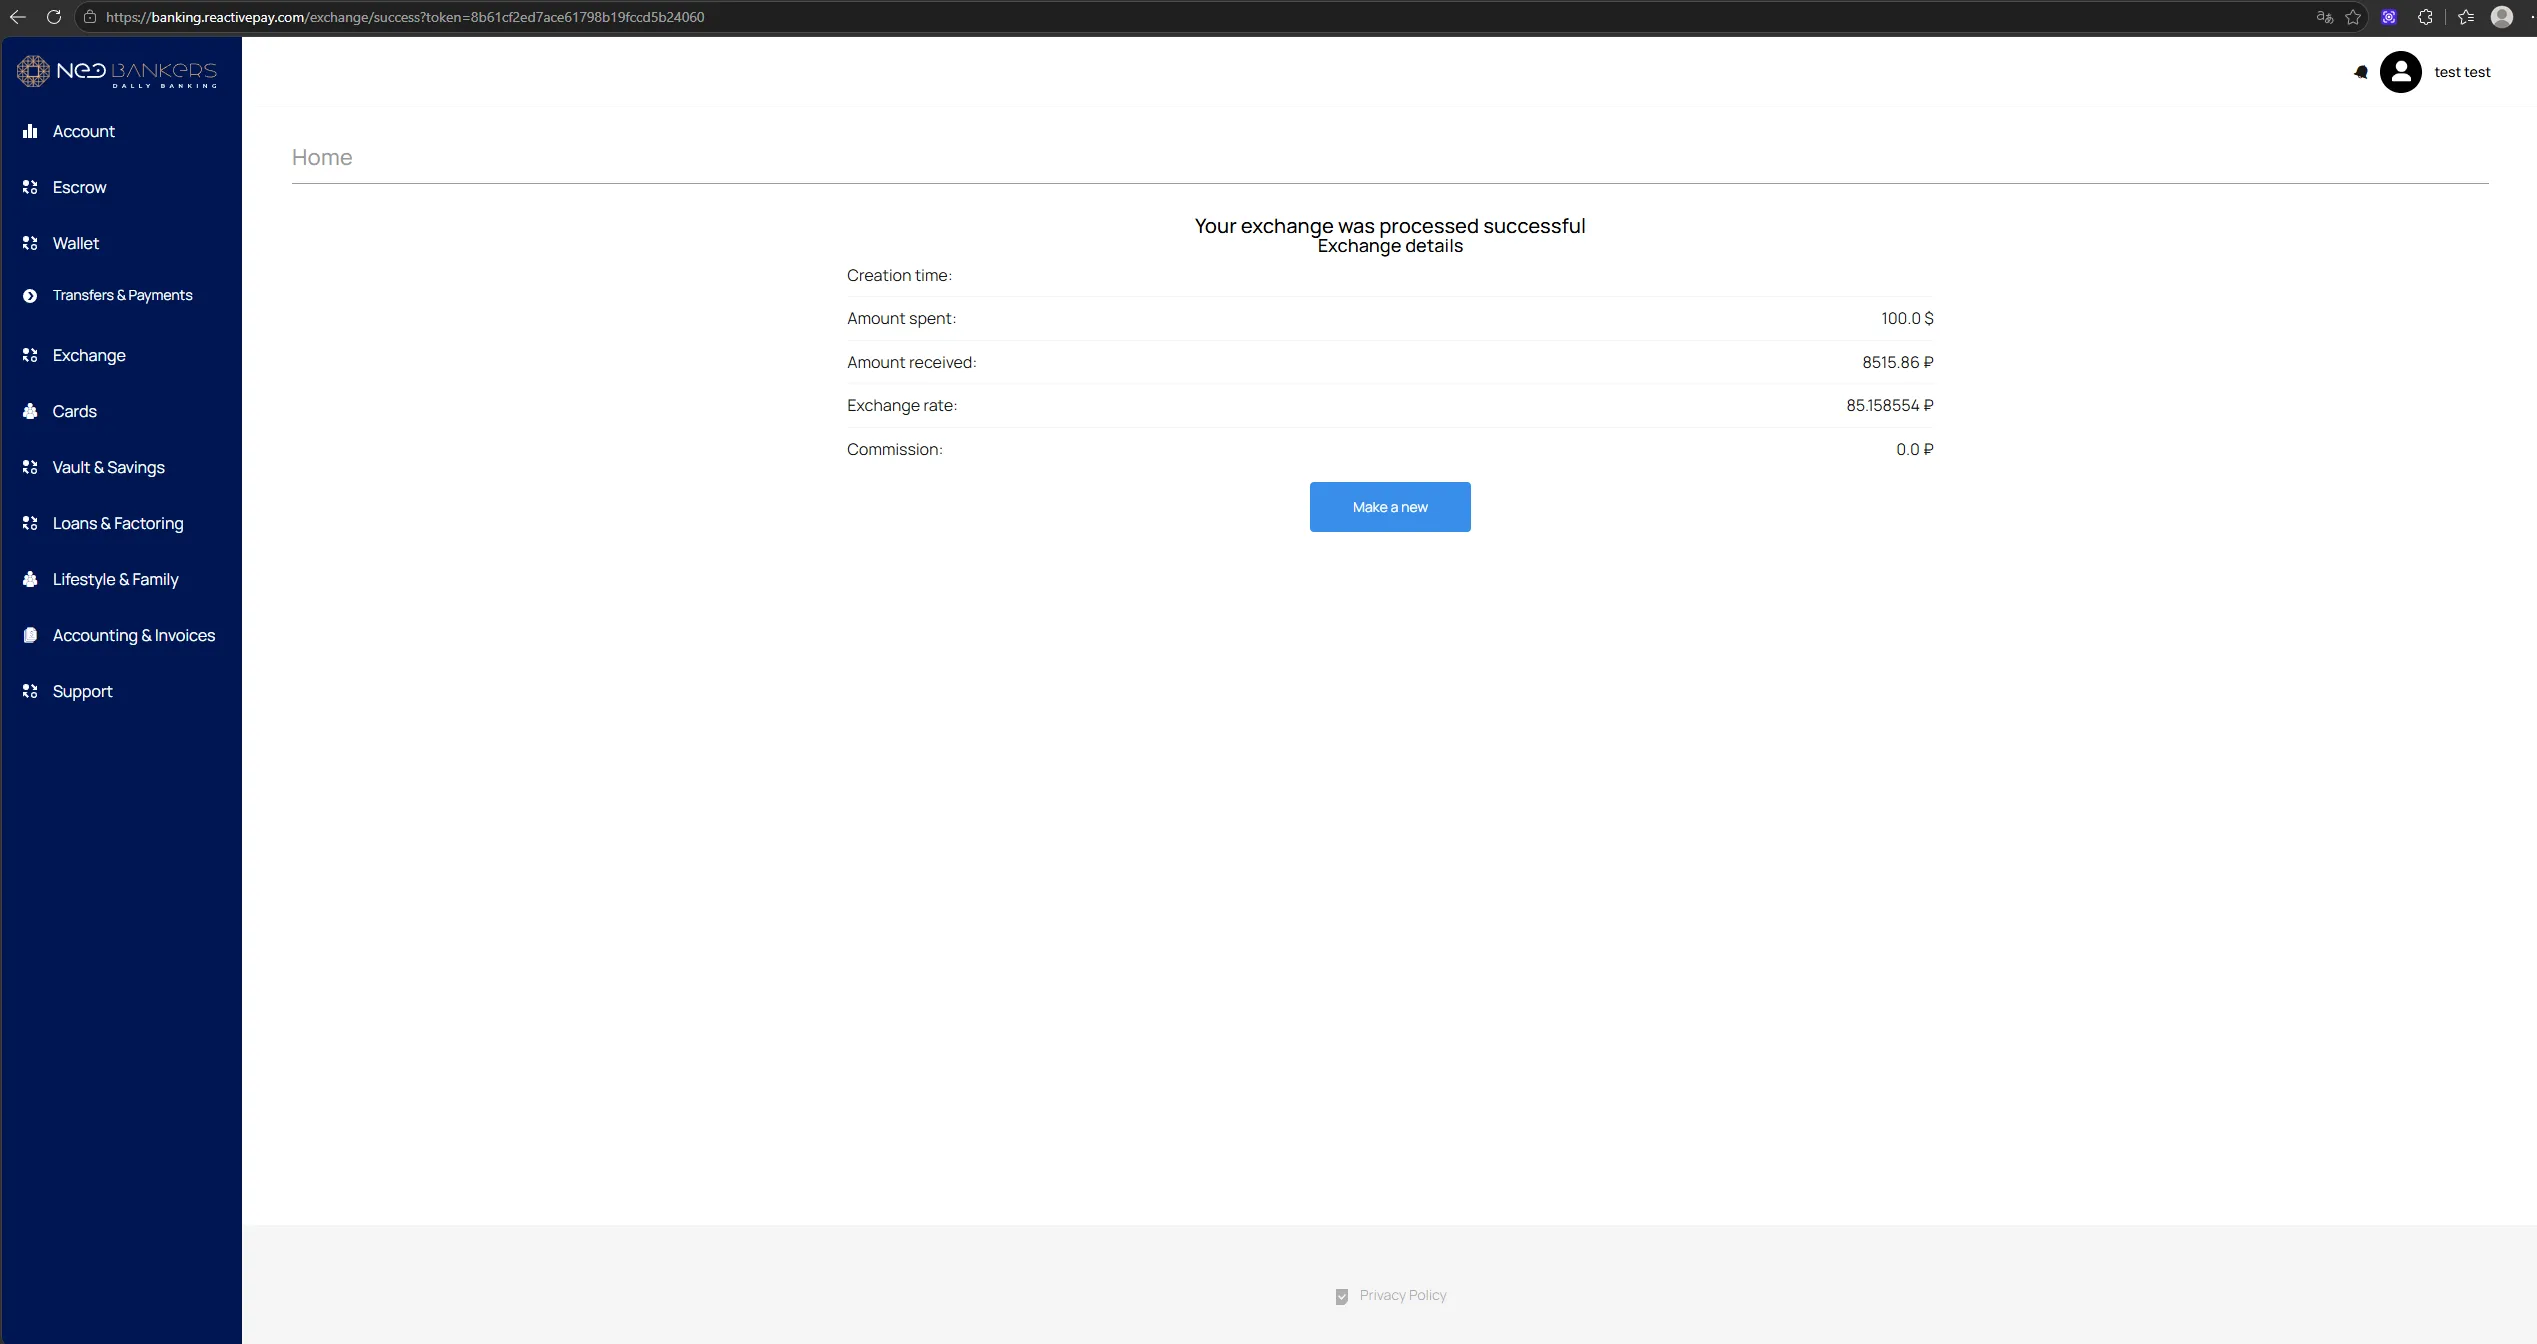
After a successful exchange, the following values are displayed:
Amount spent;Amount received;Exchange rate;Commission.
The rate is determined by Rate settings, while the commission amount is determined by Commission settings.